Published on October 21st, 2022
Last updated on February 6th, 2023
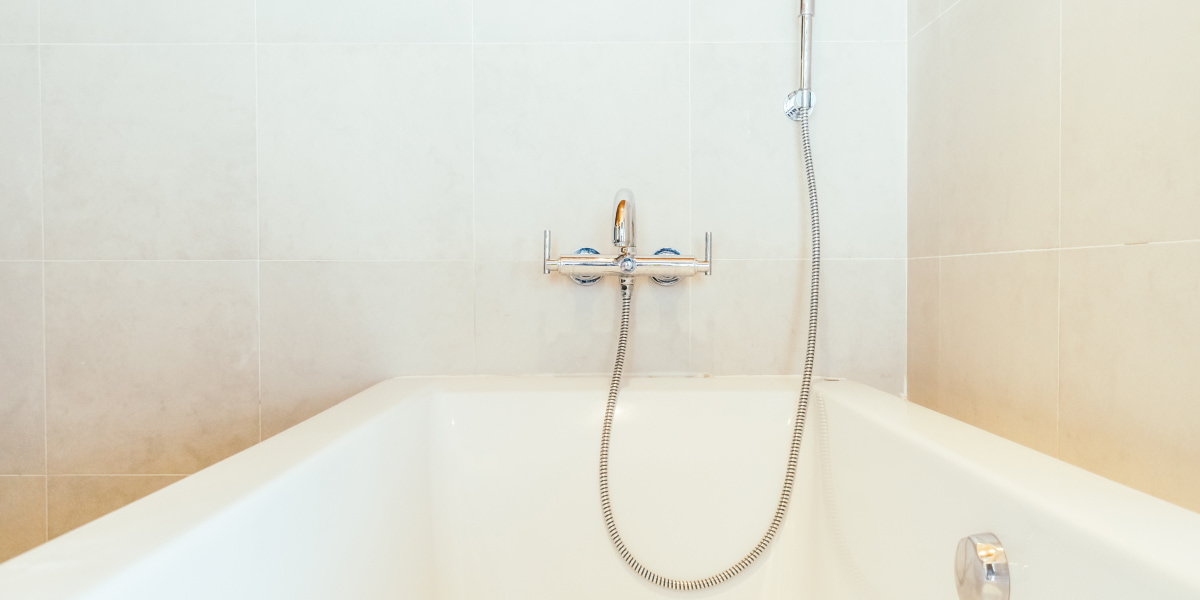
How To Remove Silicone Caulk From Shower
Many modern bathrooms are equipped with caulks to keep water out and prevent mold from growing on the surface of the bathroom. The sealant also makes the bath more integrated into the room and looks neater and cleaner. However, after some time, you may want to do a significant renovation in the bathroom, and for this, you will need to know how to remove the old protective agent – silicone caulk. Here, many may have difficulties, although removing silicone caulk is quite simple. You just need some instruments, free time, and a little knowledge.
Our article will be devoted to removing sealant from the surface of a bathtub/shower stall or any other surface. We will show you the critical aspects of this procedure and help you avoid mistakes during surface cleaning.
Silicone Caulking Removal
So, you’ve decided it’s time to remove the sealant from your shower surface. However, how could you determine when the sealant should be removed and when it could last many more years? Here are a few signs that your sealant needs to be replaced with a new one:
| Renovation. | This is the first and rather obvious point. Once you’ve decided to redecorate your bathroom, you should remove all sealant from the shower or bathtub. |
| The fixing integrity is broken. | As soon as you realize that the sealant is loose and falls off, the best way would be to remove the old caulking and replace it with a new one since the old one does not make any sense. If the caulk is damaged, it can be useful and protect your bathtub anymore. |
| Bubbles in sealant. | If you have taken a shower and noticed that bubbles form on the water’s sealant, you should replace it because it’s useless now. |
As soon as you notice two of the crucial signs of sealant failure or decide to make repairs, you can proceed to remove the protective layer. And our guide will help you with this.
After we have decided on when it is time to remove silicone sealant, you need to collect all the necessary tools for the work:
- Putty or utility knife.
- Needle-nose pliers.
- Bleach.
- Hair dryer or portable heater.
Now you can get to work.
Step 1
The first step in silicone caulking removal is to soften it entirely, but here you need to be careful. So, to soften the bond, use special tools. When purchasing such a product, check that it is suitable for your type of protective layer. You can use a hair dryer if you don’t want to use a caulk remover. However, be careful not to melt the sealant completely. Otherwise, you will have difficulties cleaning the protective layer. After you warm up the silicone, you can start removing it.
Step 2
Now you need to remove the caulk from the shower or bath. To do this, use something sharp like a blade or a clerical knife. You need to unfasten the sealant across its entire width. Carefully peel off the sealant so as not to damage the surface of the tub or shower. Also, remember to take safety precautions and wear protective gloves.
Once you’ve been able to loosen all of the sealants, you can grab one end of it with needle nose pliers and pull it. You should be able to make sure that the entire sealant tape is gradually peeling off the tub.
If the silicone caulk cannot be removed, you should reheat it for a minute and try again.
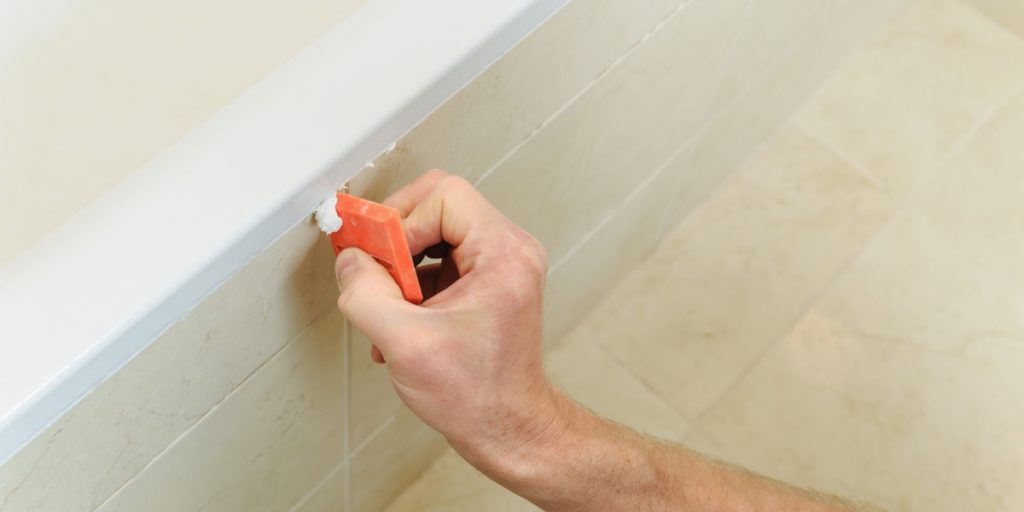
Step 3
Now is the time to get rid of all the silicone sealant residue. This will give you a more even and tidy surface for applying the new grout. To do this, you can reheat the surface and remove the remaining sealant with bleach or alcohol. After that, your surface will become almost entirely suitable for new silicone.
Step 4
The final step in the best way to remove old caulking is drying and preparing the new product’s surface. So, in no case should you apply a new glue if the shower or bath surface is wet. You need to dry the surface, as any sealant requires dryness due to the nature of the attachment.
Use a hair dryer to dry the surface. It is enough to thoroughly wipe the surface and complete the drying with a hairdryer. Now you can apply a new layer of sealant.
Why Do People Prefer Silicone as Caulk?
If you want to find caulk that won’t be removed, consider silicone. Before the invention of sealing, sealants were made of woven grass and dirt and were still in their infancy. A few decades ago, silicone sealants were invented.
Filling in gaps with sealant stops moisture from seeping in or accumulating. It also lessens airflow, leading to temperature changes within your house’s walls. Overexpansion and compression will happen when this takes place.
Use silicone sealant at cool temperatures for the best results. Conditions won’t affect how the sealant is applied when it’s cold outside.
How to Prevent Silicone Caulk from Cracks?
Have you ever looked at your freshly caulked windows or bathroom fixtures only to see cracks running through them? It’s an aggravation, but don’t worry because there are some easy ways to prevent your caulk from cracking.
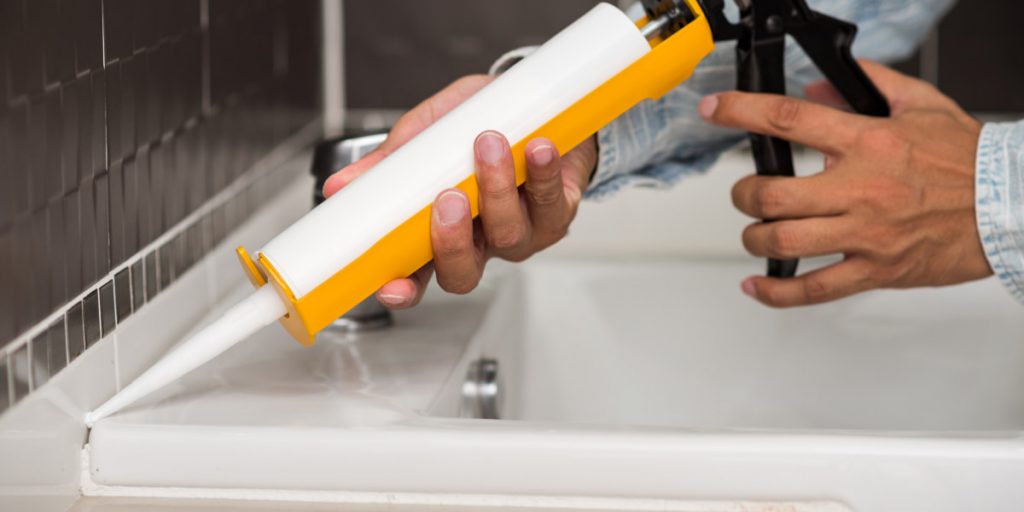
The best way to prevent cracks is by using the proper technique when applying it:
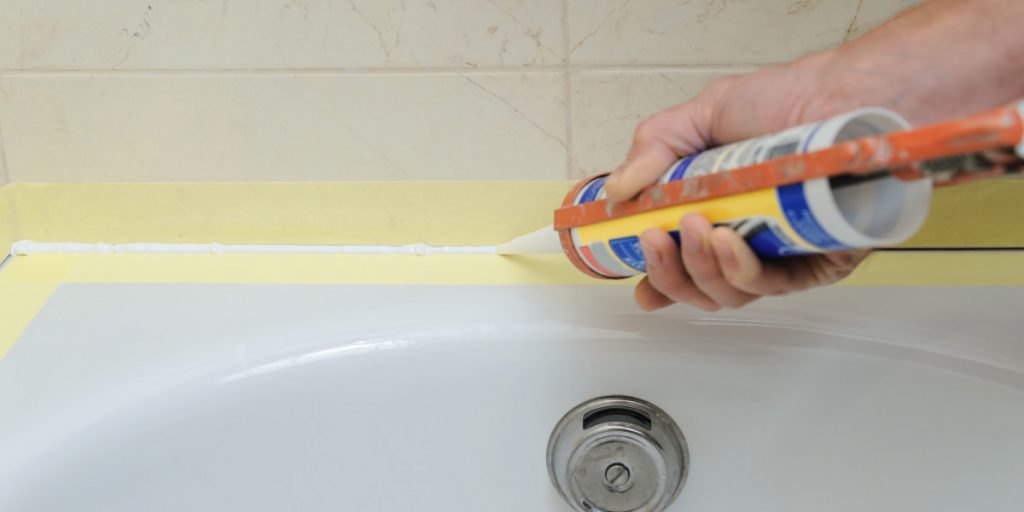
- First, make sure that you clean the surface area before attempting to apply the caulk. Any dirt or grime will cause the caulk not to adhere correctly.
- Once the surface is clean, cut the tip of the caulking tube at a 45-degree angle and use a putty knife to smooth it into the crack. As you’re applying it, run your finger along the caulk line to create a smooth and even surface.
- If you find that the caulk is too thick, you can always go back and trim away any excess with a razor blade. Just be careful not to cut too deeply and damage the surrounding area.
- Finally, allow the caulk plenty of time to dry before using the area. Check the manufacturer’s instructions for specific drying times.
- Additionally, don’t forget to take care of your bathtub correctly. You should regularly clean the tub or shower stall in the area where you applied the silicone. You should also regularly wipe off any moisture in areas with a sealant, so there is not much dampness and mold formation. It is enough to make it your regular routine during cleaning days in your home. It is also advised to clean and dry the tub after each shower.
Bottom Line
Once you have silicone caulking that needs to be removed, there are a few different ways to do it. You can use a putty knife or a razor blade to scrape it off, or you can use a silicone caulk remover. Whichever method you choose, make sure you take your time and be patient – it can be a bit of a process to delete silicone caulking. But once you’re finished, you’ll have a clean surface ready for new caulking.
FAQ
How do I remove silicone caulking from my shower?
To remove it, you can either scrape it with a razor blade or putty knife, or you can use a silicone caulk remover. Whatever method you select, be sure to take your time and be patient because removing silicone caulking can be a bit of a process. But once you’re done, the surface will be clean and ready for fresh caulking.
What’s the best way to remove old caulking?
The best way to remove old caulking is to use a silicone caulk remover. This will help to loosen the caulking so you can easily scrape it away. Just follow the silicone caulk remover instructions, and take your time, so you don’t damage the surface beneath the caulking.
How do I prevent silicone caulking from getting hard?
To prevent silicone caulking from getting hard, you should store it in a cool, dry place. You should also ensure that the area where you’re going to apply the silicone caulking is clean and free of debris. And finally, follow the instructions on the silicone caulk carefully so that it doesn’t get hard before you’re ready.
How do I know that I applied caulk correctly?
If silicone caulking is applied correctly, it will be smooth and even. There should be no gaps or voids. You should also see a nice bead of silicone around the entire perimeter of your shower or tub.