
Published on January 24th, 2023
Last updated on February 3rd, 2023
How To Take Off A Popcorn Ceiling: Best & Easiest Step-by-step DIY Guide
The popcorn ceiling was a great design choice in the 1950s. But, today, such a solution for the house looks at least strange and inappropriate. It would be foolish not to note its soundproofing and heat-insulating properties. But such a house solution may not only be an ugly addition to your home but also become hazardous to your health.
Many homeowners are more and more looking for DIY popcorn ceiling removal solutions. But this procedure may be more complex than it might seem at first glance. To do this, you need to:
- Collect all the necessary materials.
- Find your free time.
- Protect yourself during work.
Also, popcorn covering often has the problem of hazards to your health due to asbestos.
Our article will discuss the asbestos problem and how to take off the popcorn ceiling. We will also show you how you can know if your ceiling contains asbestos. And what’s more, we’ll provide you with the best way to remove the popcorn ceiling.
Getting Rid of Popcorn Ceilings
Before cleaning the top of a room, you need to determine if there is any asbestos.
It is a mineral that has been widely used in the production of building materials such as:
- Popcorn.
- Asbestos cement boards.
Excellent thermal insulation properties and low cost characterize it. But it is dangerous to human health.
Replacing the popcorn ceiling can release asbestos microparticles into the air. And it can enter the lungs and cause various diseases such as:
- Asbestosis (asbestos inhalation disease).
- Mesothelioma (lung cancer).
Dismantling a popcorn comes with health risks. And you need to make sure that the top part is free of asbestos before starting work.
To do this, you can use special test kits. They allow you to quickly and efficiently determine the presence of asbestos. So, getting rid of popcorn ceilings becomes easy. These test kits usually consist of several ampoules with different reagents. They destroy asbestos and allow its presence to be determined by the color of the reagent.
If the test shows the presence of asbestos, you should contact a specialized organization. Such an organization has the equipment and knowledge to remove asbestos covering safely. Otherwise, the risk of illness will be significantly higher.
You can buy asbestos test kits in specialized stores or order online. They are usually inexpensive and easy to use, so take advantage of them to save time and money. This can significantly reduce health risks and help plan further work on the ceiling.
Gather Your Tools for DIY Popcorn Ceiling Removal
To remove the popcorn top part, you will need the following materials and tools:
- Spatula – for crushing popcorn.
- Brush or broom – for removing ruined popcorn from the ceiling.
- Vacuum cleaner – for cleaning dust and popcorn residues.
- Scissors or knives – to remove depressions or scuffs on the surface of the ceiling.
- Primer and paint – for closing cracks and repairing the top surface.
Please note that DIY popcorn ceiling removal can be quite a noisy and dusty process. It’s a good idea to wear a face shield and goggles to protect yourself from the dust. We will talk about this in the next paragraph.
Protect the Walls
Consider the fact that cleaning coating is a messy procedure. During grinding, all the ceiling pieces will fly in all directions and stain your walls and floor. Therefore, you need to protect all your furniture, walls, and floors.
For clear getting rid of popcorn ceilings:
- Remove all furniture that is not attached to the floor.
- Turn off all electrical appliances in the room and protect your wires. You will use water during the covering cleaning procedure.
- Close all vent ducts.
- Remove top fixtures like chandeliers and fans.
- Hang a tarp on the walls.
- Lay a tarp or rags and newspapers on the floor.
By taking these steps, you can effectively protect the surfaces of your room. This way, you don’t have to spend time cleaning your working area.
Use Water for the Easiest Way to Remove Popcorn Ceiling
There are two methods you can use while removing your popcorn top part:
- Cleaning with water.
- Cleaning without water.
Cleaning without water will give a cleaner result. And you won’t have to waste time protecting everything around you. But cleaning with water will provide you with a smoother and faster result. The thing is, the water will help soften the ceiling. And it will make the scraping process more comfortable for you.
We recommend using water and the easiest DIY popcorn ceiling removal method. But we do not recommend using too much of it. It is also best to work with small sections. The water will not have time to absorb much and will not dry out where you have not yet begun to work.
Here’s a revised version of the cleaning routine:
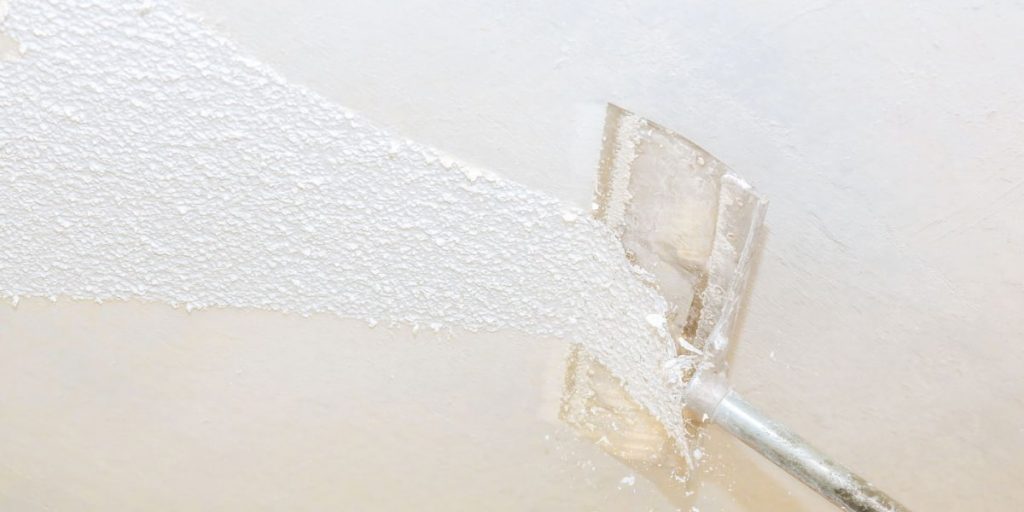
- Apply a small amount of water to a small section of the ceiling.
- Wait 15 minutes.
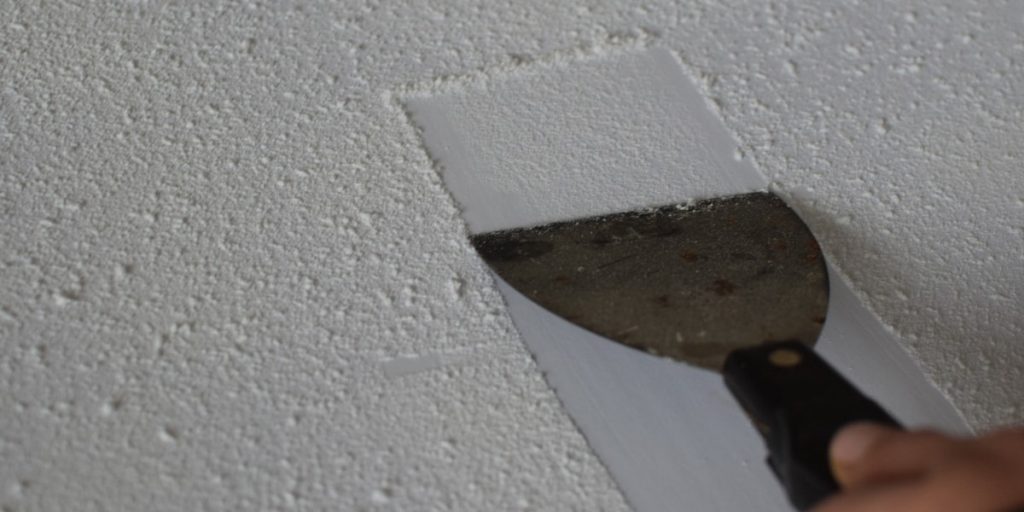
- Begin scraping the coating.
- Repeat the process with other sections.
Remember to be cautious and avoid damaging the top surface while working.
Sand and Apply Paint After Replacing Popcorn Ceilings
You may have a question: “What to do after removing the popcorn ceiling?”. Once you’ve cleared the top of a room, you can make it beautiful and inviting. To do this, you can sand the surface of your top and apply a coat of paint.
After this procedure, you can remove all protection from your walls. After that, clean the dirt on your floor and move the furniture. When your ceiling is completely dry, you can hang your fan or chandelier from the ceiling.
What Mistakes Do People Make When Getting Rid of a Popcorn Ceiling?
When removing a popcorn coating, people often make the following mistakes:
- The workplace is not properly prepared. This can cause dust and popcorn residue to be scattered throughout the room. This can damage the furniture and floors.
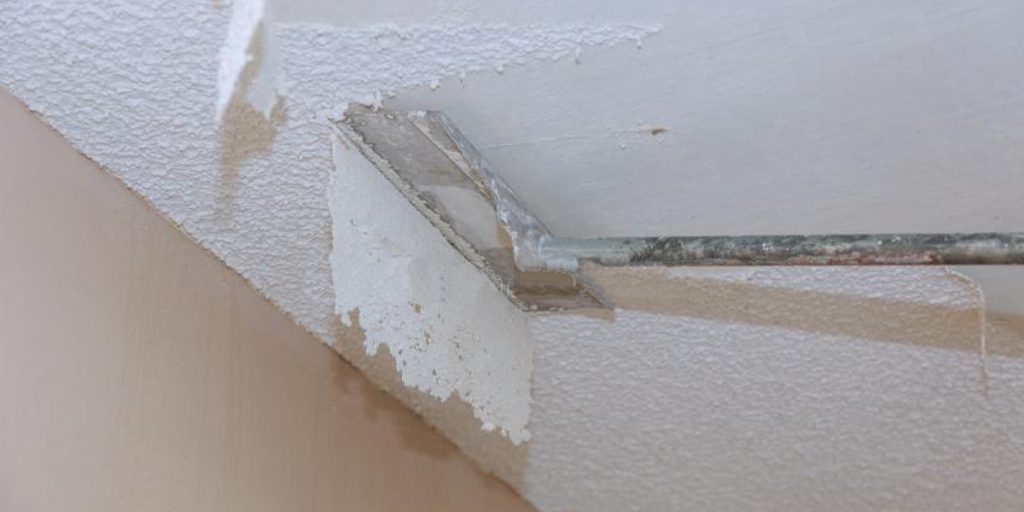
- The spatula is being used incorrectly. It is necessary to press too hard on the spatula to avoid damaging the ceiling. You should also avoid hitting corners and cables that may be under the popcorn.
- The popcorn is not cleaned thoroughly enough. Removing all popcorn residue, so the ceiling is level and ready for painting is necessary.
- Insufficiently carefully prepare the ceiling before painting. It is necessary to close the cracks and repair the top surface to get an even and smooth result. You should also pay attention to the fact that the ceiling was well-dried before applying paint.
- The paint is misapplied. You must follow the paint manufacturer’s recommendations and apply the paint evenly to get a good result. Too thick layers of paint should also be avoided as this can cause the paint to streak.
To avoid these mistakes, it is recommended to seek help from professional artisans or prepare well for work by reading specialized literature or watching lessons on the Internet.
How Much Does a Professional Popcorn Coating Removing Service Cost?
The cost of a professional ceiling popcorn removal service depends on:
- The size of the room.
- The complexity of the work.
- The materials and tools used.
- The place in which the room is.
The average cost of the service can range from 1000 to 1700 dollars.
But this is only an indicative price. And the actual cost of the service may be lower or higher, depending on the factors indicated. It is best to consult with several firms and compare prices to find the best deal.
Conclusion
Now you know the easiest way to remove the popcorn ceiling. With the help of our short and informative guide, you can get rid of the outdated solution for your top. To do this, you just need to collect the necessary tools for work and find some free time.
However, always remember to take precautions. Wear safety goggles, gloves, and a dust mask. And don’t forget the answer to the question: “What to do after removing the popcorn ceiling?”. Always cover it with paint to protect it and make it attractive.
FAQ
What to do after removing the popcorn ceiling?
After removing the popcorn ceiling, you can:
1. Repair any drywall damage.
2. Prime the ceiling.
3. Sand it for a smooth finish.
4. Paint it.
Can I remove a popcorn ceiling by myself?
It can be a labor-intensive and time-consuming process. It is important to take proper safety precautions and work slowly and carefully. If you are unsure about your ability to safely remove a popcorn ceiling, it is best to hire a professional.
Will removing a popcorn ceiling damage the drywall underneath?
There is a risk of damaging the drywall underneath a popcorn ceiling. It’s especially if the ceiling is old or if it was not installed properly. To cut the risk of damage, use a scraper or drywall knife with a sharp, clean edge. And work slowly and carefully to avoid tearing or puncturing the drywall.
What should I do if I find asbestos in my popcorn ceiling?
Asbestos is a hazardous material that can cause serious health problems if inhaled. If there’s the presence of asbestos, you need to hire a licensed asbestos abatement contractor. They will safely remove the ceiling. Do not try to remove an asbestos-containing ceiling yourself.